There are few things in the world that are more versatile than a piece of paper. Everything from great novels to simple shopping lists have been written on the material, making it easy to take for granted.
Paper really can do everything – including stimulating the imagination. Being creative with paper has been found to be a great way of unlocking and boosting inventive thought. Numerous organisations use paper-folding exercises as an “ice-breaker” at the start of courses or workshops to help get participants in the right frame of mind for a brainstorming exercise.
Want to learn how to make things out of paper? It’s all about the art of paper folding. Look at any book about paper folding or how to do origami and you’ll see that the possibilities are as limitless as your imagination. To get you started, we’re going to walk you through how to make paper origami for a number of relatively simple items that you can create with just paper and scissors.
How to make a ninja star
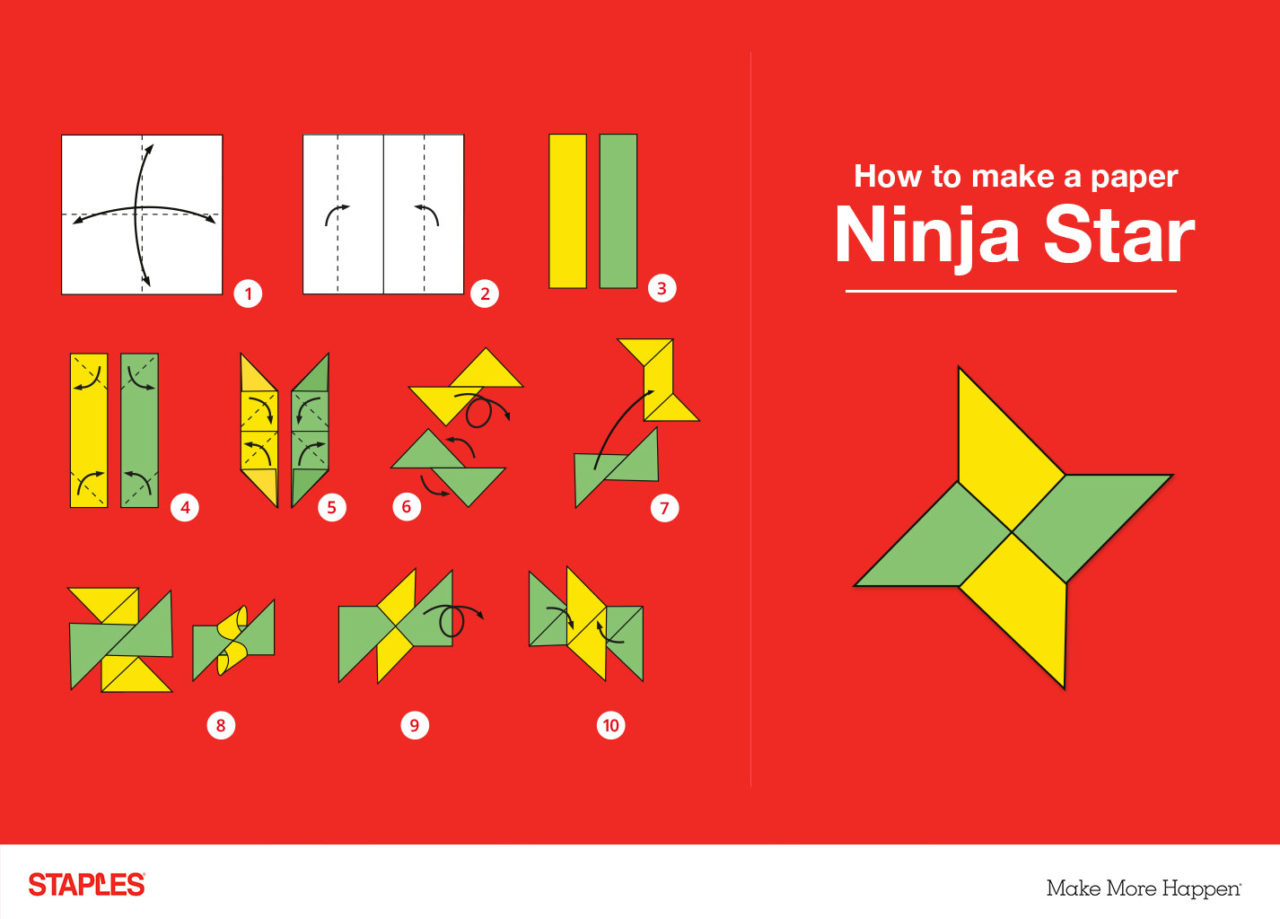
1. Take a square (not rectangle) sheet of paper
2. Fold the paper in half
3. Then fold the newly-formed halves in half
4. Cut the folded paper in half to create two-folded strips
5. Fold in each corner on the two pieces
6. Fold in the top and bottom corners of each remaining rectangle to create two big triangles
7. Flip the two triangles over
8. Lay one of the triangle onto the other
9. Tuck the folds into the pocket
10. Turn over again and tuck the back folds into the pocket
11. Voila!
If you want to know how to make a ninja star, the most important thing that you’ll need is a square piece of paper. Obviously the larger the piece of paper you start with the larger the finished star will be and if you start with too small a square, this will make it difficult to fold.
To make the star, just follow the steps above. One important thing to remember is that your folds will have to be very accurate and the edges will have to line up exactly if you’re going to create the perfect star.
As to how to use your star once you’ve made it, why not thread a loop of cotton through one of the “points” and put it to one side ready to decorate the office?
How to make a paper hat
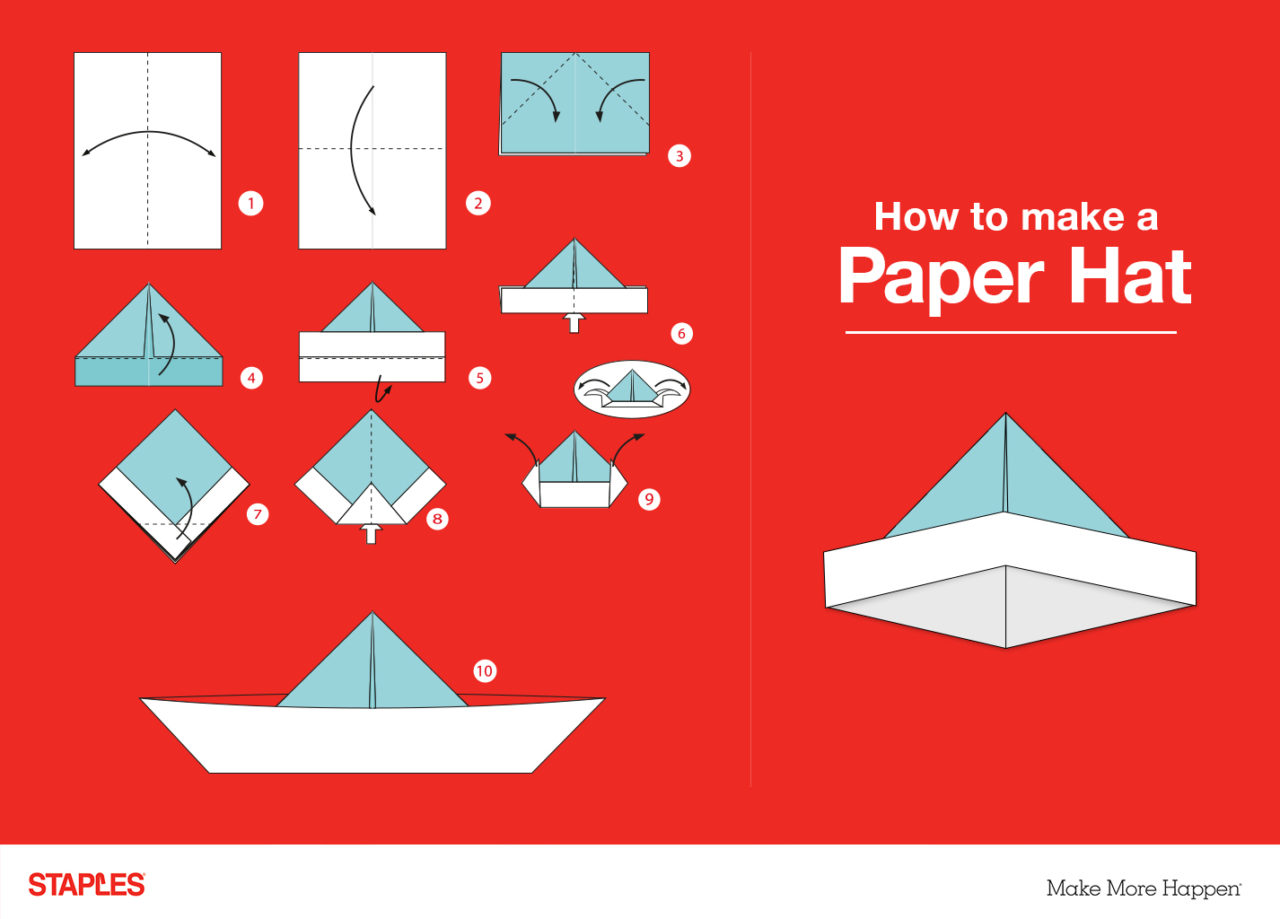
1. Get your materials together – one sheet of paper – and place in portrait position
2. Fold the sheet of paper vertically and straighten out
3. Then fold the piece horizontally
4. Find the centre of the folded sheet and fold the top two corners into the middle
5. Fold the two bottom flaps of paper up to make the brim
6. Pull the folded slides out and flatten
7. Fold the front and back layers of the paper up
8. Fold the lower corner up slightly
9. Fold the outer corners in, and pull out
10. Put your paper hat on!
There are lots of designs you can use when you’re deciding how to make a paper hat, but the one that we’ve chosen is one of the easiest. Our top tip would be to get creative with your paper hat, decorating it with playful patterns and additional texture – just grab some coloured pens, glitter, glue and stickers. The more creative, the better.
We’ve mentioned the role that paper-folding can play in brainstorming and it’s here that you could make something especially useful for your session by creating am “ideas hat” that you pass around the group.
How to make a paper airplane
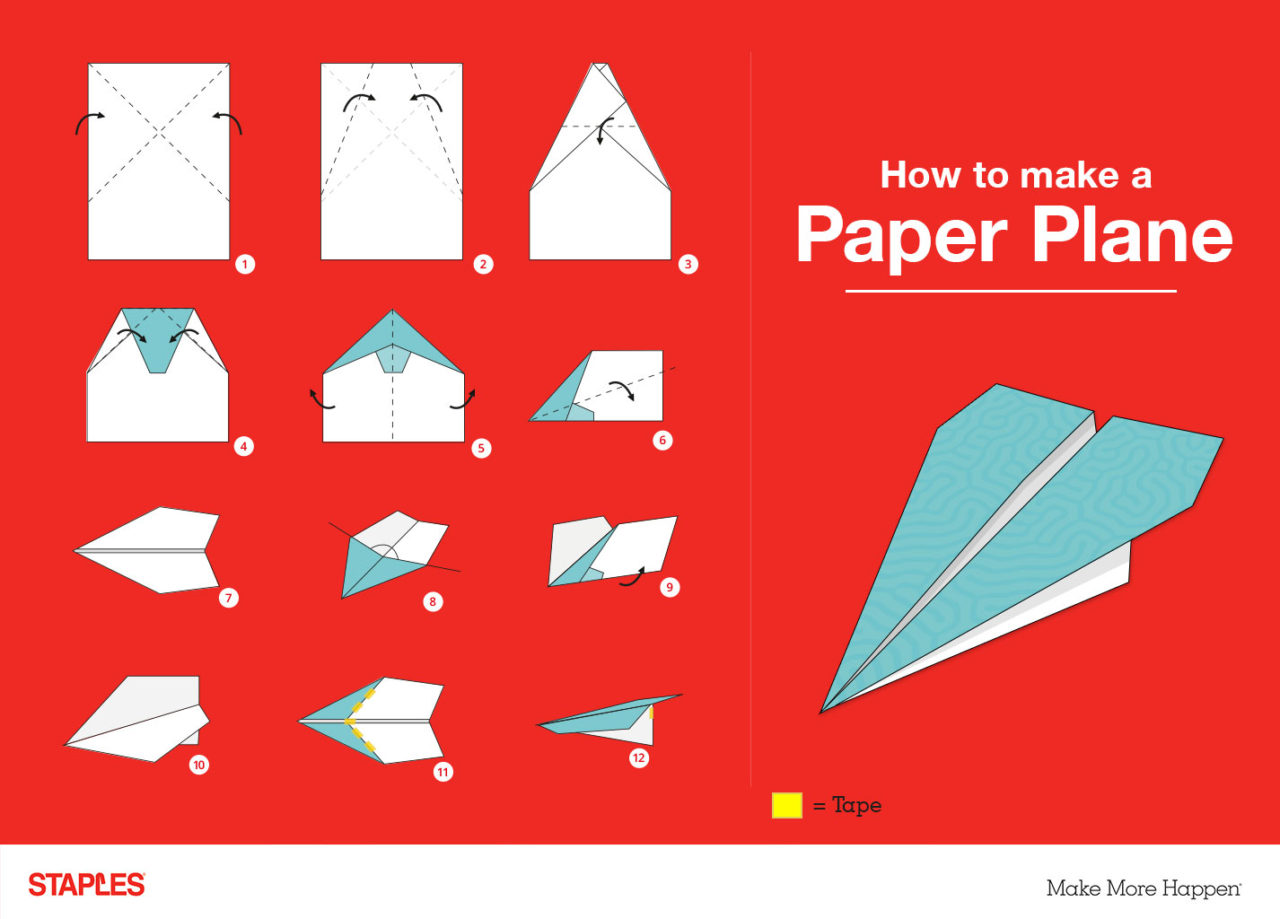
1. Create a diagonal line, folding the top right corner to the left-hand long edge
2. Straighten out and fold the top left corner to the right-hand long edge
3. Unfold, take the long right-hand edge and align with the diagonal running from top-left corner
4. Repeat for the long left-hand edge, making it as symmetrical as possible
5. Fold the top point down, so the crease on the back aligns with those on the front
6. Fold the top right corner into the centre, then fold the top left corner into the centre
7. Fold the centre to create the nose and make a long crease once happy with the sides of your plane
8. Take a piece of card, cut a 155 degree and 165 degree angle and measure your airplane – rear = 165, tip = 155, nose = 165
9. For the wings, fold the paper 3mm up from the nose – the long edge of the wing should line up with the bottom right-hand corner
10. Fold wings into position and securely fold creases
11. Place thin strips of tape on the wings (30mm)
12. Place a thin strip of tape on the rear to secure (30mm)
Follow these steps and you won’t just be making any old paper airplane – you’ll be creating a world record-breaking airborne masterpiece. This creation managed to fly for a huge 226ft (69m), no mean feat for something simply made out of paper.
As a tip, experiment with different weights of paper to see what proves to be the most aerodynamic and then have an office competition to see whose can fly the furthest.
So there you have them, a number of different ways to get creative with paper. Now all you need is to order your paper and you’ll be all set to fold.

